In this manual we describe how to create a custom VLAM module. We will construct a ``2in2out'' module as an example, which consists of two input and two output ports. Based on this example one should be able to create any type of VLAM module, no matter the amount of input or output ports, or the number of parameters.
Start MatLab and run Simulink:
(we used MatLab Version 5.3.1.29215a (R11.1), Oct 6 1999, and Simulink version 3.0 to create our modules)
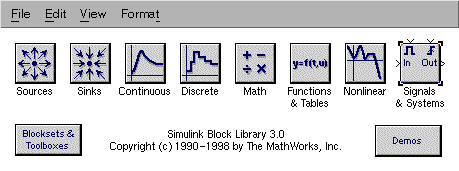
Click on "Signals & Systems":
The components we will use are the in and out port.
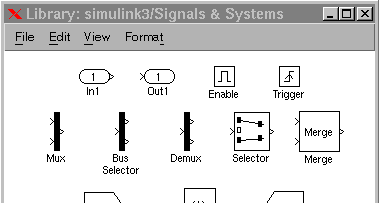
Create a new model (). Drag two in ports and two out ports to this new model.
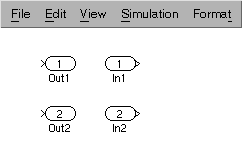
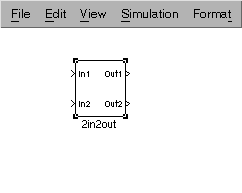
Note that the out ports are placed on the left and the in ports on the right. The symbols attached to the ports show why: the out ports that are placed on the left will receive data, the in ports will send.
Now select all ports by dragging a square around the four ports using the mouse.
Apparently there exists a difference between selecting all components by dragging a square around them, and using "Select all" (CTRL-A) or clicking on each component. The last two operations select all components, but Simulink does not offer the option to create a subsystem. This option is available when using the first "dragging" method.
We are going to create a subsystem: (CTRL-G). The result looks pretty messed up:
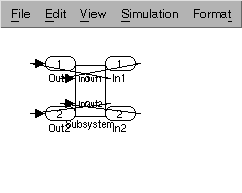
We will now remove the unnecessary and duplicate elements. Remove all the lines and remove the original in and out ports. We now see the clean subsystem. Click once somewhere on the subsystem and enlarge the subsystem by dragging one of the corners. Finally, we change the name from "Subsystem" to "2in2out":
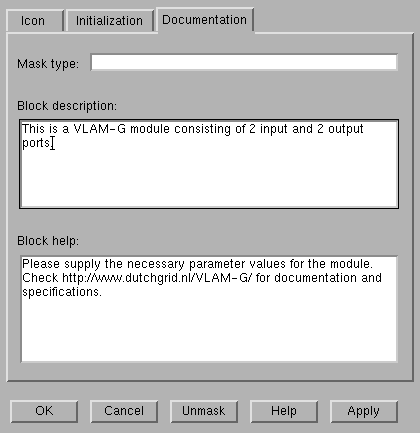
The basic building block is now ready. Because we want to use this block as a VLAM-G module, we have to mask the system and supply the required parameters. (CTRL-M). The Mask Editor opens, showing three tabs: , and . We start by filling in this last tab:
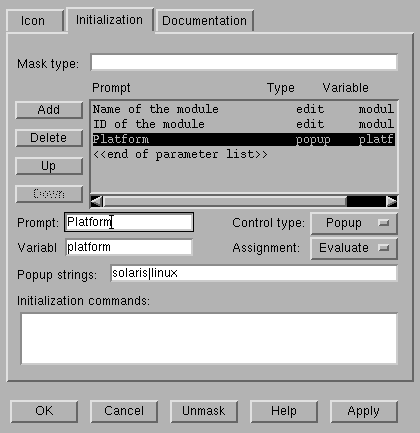
We move to the tab for the implementation of the mask. The Mask Editor allows us to add parameters. For each parameter we can specify the prompt (the text the user will see), the control type (whether the user sees a form, a checkbox or a list box), the variable name and in case of a listbox the popup strings (more about this option in a moment).
Because we want the user to supply the values for a VLAM-G module, we have to add the required parameters to the mask. Our MDL2XML tool converts the MDL description to XML, and searches for these parameters. It is therefore compulsory to follow the naming convention that is displayed in this table.
variable name | type |
| moduleName | edit |
| moduleId | edit |
| platform | popup (solaris | linux) |
| proglocation | edit |
| outport1 | edit |
| outport2 | edit |
| datatype | popup (double | integer) |
| direction | popup (input | output) |
| replication | popup (false | true) |
| host | edit |
| dn | edit |
| Required variable names for MDL2XML | |
We have added the moduleName, moduleId and platform to the mask. The platform variable shows how a listbox can be created; the control type "popup" is selected, the values that need to be in the popup or listbox are specified in the "popup strings" field.
The values are separated by a pipeline ( | ). The advantage of using a popup is the fact that the input can be controlled. Free text fields are sensitive to errors, which can be prevented using the popup box. The following screenshot shows the Initialization tab with a popup variable selected.
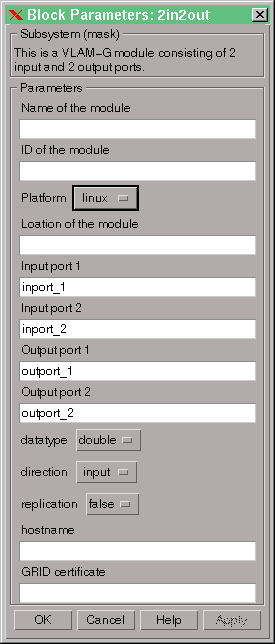
When all of the necessary parameters are defined in the mask, the module is complete. The designer of the module can choose if he wants to predefine a value for certain parameters. If he chooses to do so, he can double click the 2in2out module to open the window that will also be presented to the end user when he uses the module. Values that are entered in the 2in2out module before the module is saved in a (VLAM module) library are stored as the default values for the parameters. An example is shown in the figure below.
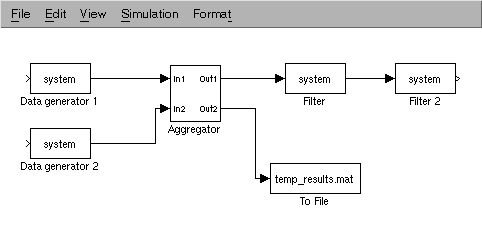
Our 2in2out module can now be used as part of an experiment. An example of such an experiment is shown below, this of course just an example to show the possibilities of our new module.
This concludes our HOWTO for the creation of a custom VLAM-G module.
| Author: | Joost Zoetebier | ( jgztbier@science.uva.nl ) | Computer Architecture and Parallel Systems Group |  |
| Supervisor: | Arnoud Visser | ( arnoud@science.uva.nl ) | Faculty of Science | |
| This page was last updated on: | University of Amsterdam | |||
Back to main thesis page.